
Working in the round is my favorite way to work with mosaic crochet, because not only are bags endlessly useful, but you also have far, far fewer ends to deal with when finishing your work.
If you aren’t familiar with overlay mosaic crochet yet, I recommend reading this page first:
Click here to view the right-handed version of this tutorial
Foundation Chain
Starting with a foundation chain is very similar to working flat mosaic. The biggest difference is that you won’t be including any border stitches, so the count of your starting chain will be different.

The chart has a repeat section of 12 stitches plus one extra stitch, so your starting chain will be a multiple of 12 + 1. For my example I made a swatch with 3 repeats: 12 x 3 = 36, plus 1 is 37.
Row 1: In Color A ch 37. Ch 1 then sc across for a total of 37 sc.
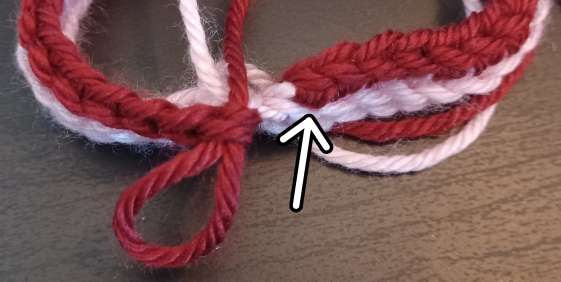
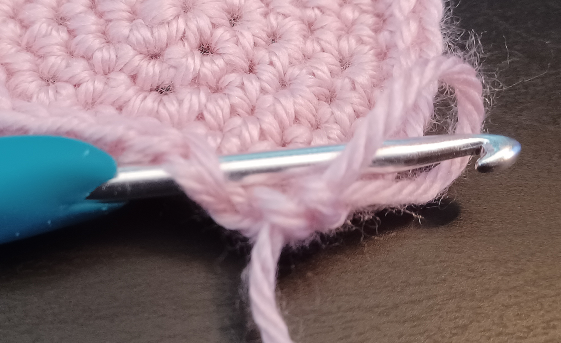
Pull out a loop of yarn and remove your hook. Flip your work over, and insert your hook back to front into the first stitch. Make sure your work is not twisted!
Hook back onto your working loop, pull through and tighten.
Flip your work back to the right side. Your working yarn should now be on the back side of your work. Hook Color B and pull through.
Chain one. You can now begin row 2 of the chart starting in the back loop of the stitch directly below your join. (The previous row counts as row 1 of the chart.)
At the end of row 2 you’re going to join to the first stitch the same way as before. Pull out a loop of yarn, remove your hook, flip your work over and insert your hook back to front into the first stitch. Hook your working loop and tighten, then flip your work back over.
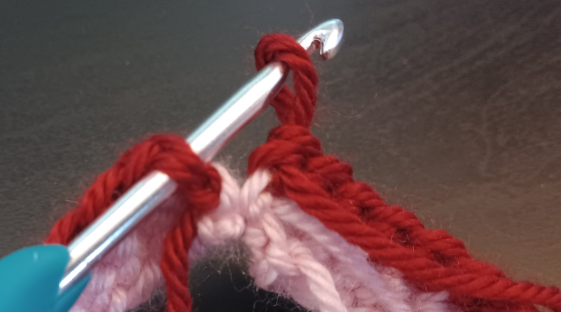
Hook Color A, pull through, and chain 1. Continue with the rest of the chart, joining in this way after each row and carrying the yarn up the side.

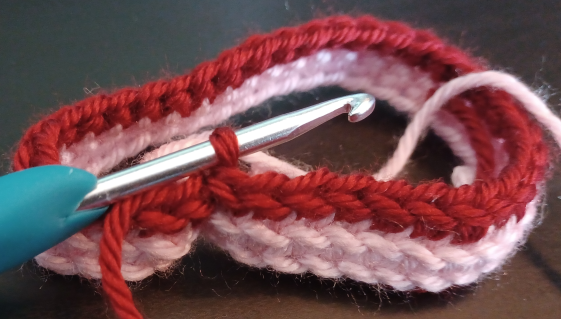
Special thanks to SixelDesign who developed this method of joining in the round for mosaic crochet! It makes the color changes very easy, and the end result is nearly seamless.
Foundation Circle
If you’re starting with a circle you’ll need to determine how many stitches to begin with and how many rows out you want to work. This will be different for every chart based on the number of stitches in the repeat section.
As a general guideline you want to start your circle with either the same number of stitches as the repeat, a multiple of that number, or a division of that number.
Here are some examples:
- If the repeat section is 6 stitches long, start your circle with 6 single crochet. Every increase row will add another repeat of the pattern.
- If the repeat section is 4 stitches long, start your circle with 8 single crochet. Every increase row will add two repeats of the pattern.
- If the repeat section is 12 stitches long, start your circle with 6 single crochet. Every increase will add half of a repeat, and you’ll want to end on an even number of rows.
Why not always start with a number of stitches equal to the repeat count? That would make it easier, but adding too few or too many stitches to the start of your circle can cause it to warp or turn in on itself. For a flat circle with single crochet I find starting with 6-8 stitches works best.
Since our chart has a repeat of 12 stitches, we’re going to start with 6 single crochet and continue for an even number of rounds until it’s the desired size, increasing every round.
Begin with either a chain loop or a magic circle, whatever you’re most comfortable with. At the end of each round you can either slip stitch to join and chain 1, or work in spiral rounds.
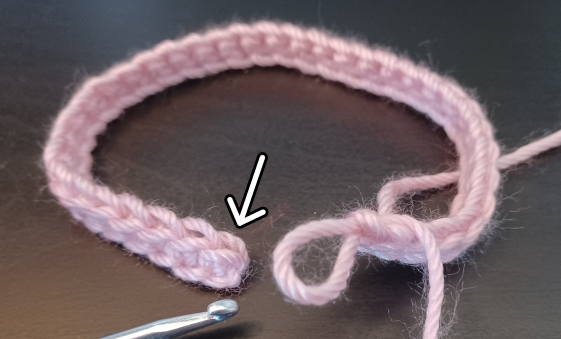
For my example I worked 6 spiral rounds, which gave me 3 repeats of the pattern.
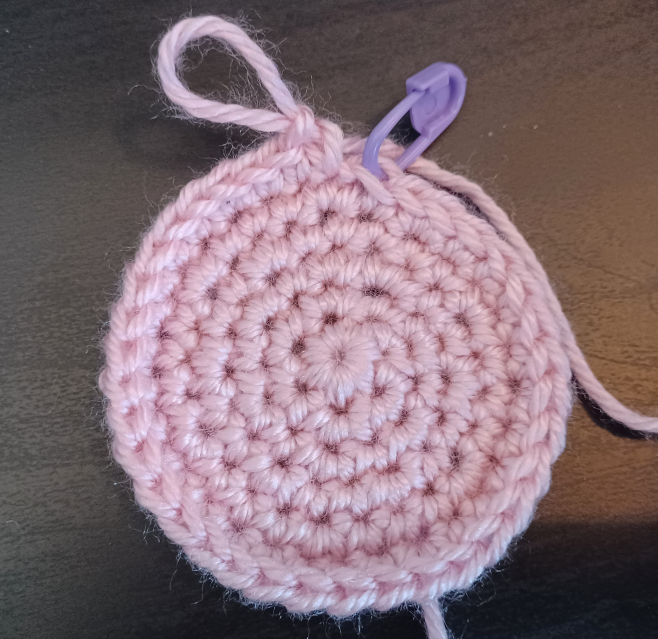
Since this chart has one extra stitch outside of the repeat, once you’ve reached the desired number of rows add one more stitch at the end.
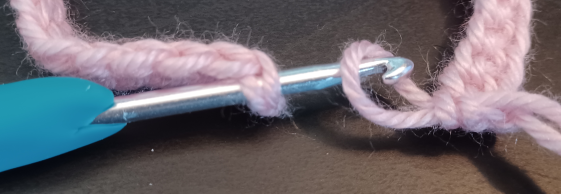
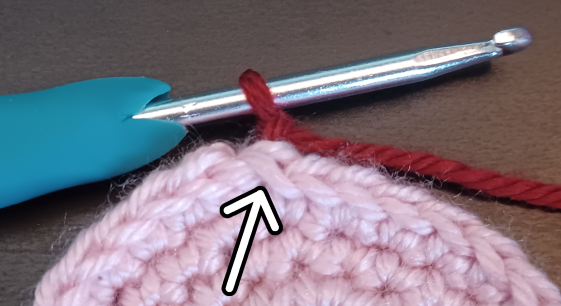
Pull up a loop and remove your hook. Flip your work over, and insert your hook back to front into the next stitch (marked with a stitch marker in the above image). Hook back onto your working loop, pull through and tighten.
Flip your work back to the right side. Your working yarn should now be on the back side of your work.

Hook Color B, pull through, and chain 1. You can now begin row 2 of the chart starting in the back loop of the stitch directly below your join. (The previous row counts as row 1 of the chart.)
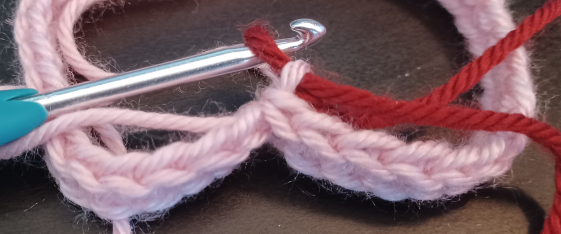
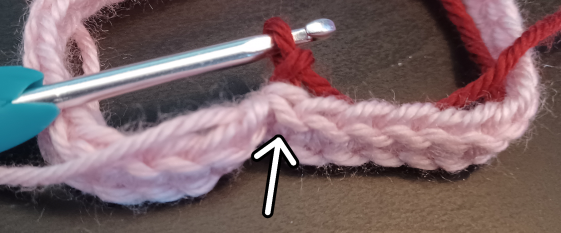
At the end of row 2 join the same way, and switch to Color A. Continue joining this way for the rest of the pattern.


I really like making drawstring bags this way, as they work up fast and are endlessly useful. Any chart based pattern can be worked this way, so if you’ve got one you like give it a try!
Leave a Reply