
The patterns on this site are made with overlay mosaic crochet. If you’re not familiar with it, it can look pretty intimidating! But it’s actually much more simple than it looks, and you only need to know a couple of basic crochet stitches to get started: single crochet and double crochet.
Note: There is another type of mosaic crochet called inset mosaic crochet. While the techniques are similar they are not the same, and the charts are not interchangeable. This tutorial is for overlay mosaic crochet only.
Click here to view the right-handed version of this tutorial
Reading The Chart

While you may find some patterns with written instructions, most mosaic crochet patterns are chart-based. The chart is read from the bottom to the top and worked either right to left (if you’re right-handed) or left to right (if you’re left-handed). You’ll be working from the front side of the work only and cutting the yarn at the end of each row.
Color A: This color will be the base of the design. It’s used on every odd numbered row.
Color B: This color will make up the lines of the design. It’s used on every even numbered row.
Repeat section: This part of the chart will repeat across the length and height of your work.
The chart itself is made up of empty squares and squares marked with an X. Each square represents one stitch and indicates what type of stitch it is:
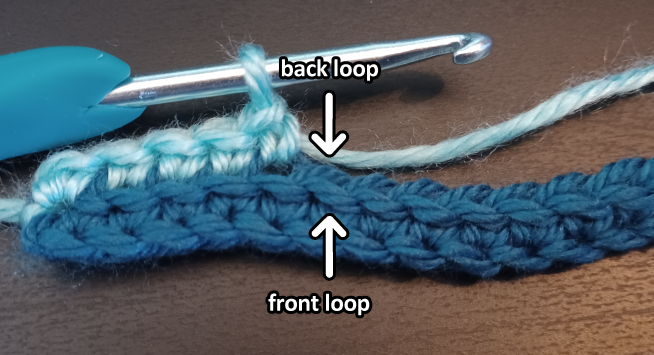
Empty squares: These are worked as a single crochet in the back loop of the previous row.
Squares marked with an X: These are worked as a double crochet in the front loop of the stitch two rows down (the previous row in the same color as the current row).
It’s very important to make sure you’re following the symbols indicated in the chart and NOT following the color of each square! The colors in the chart are only there to provide a visual for the design, they do not indicate which color to use.
Following The Chart
To get started we first need to determine how many stitches long the work will be. The chart has a repeat section of 12 stitches, so the length needs to be a multiple of 12. There’s also one extra stitch in the chart that isn’t repeated, plus two border stitches every row (more on that later) so the total length will be a multiple of 12 plus 3 (1 extra stitch and 2 border stitches).
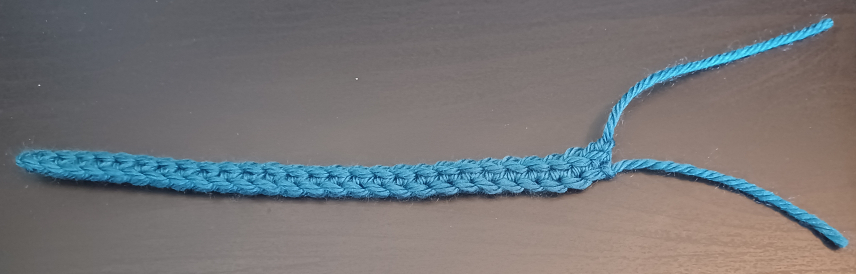
For this tutorial I made a swatch with two repeats. 12 x 2 = 24, plus 3 is 27. This will be your starting chain (ch).

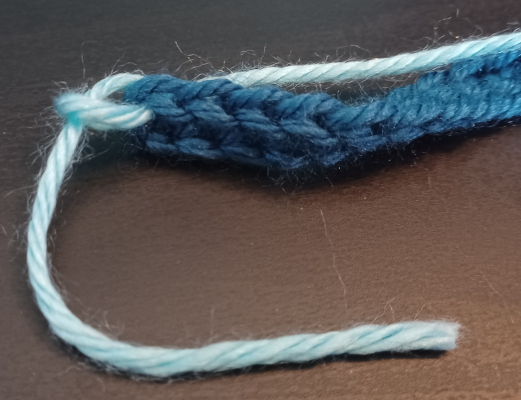
Row 1: In Color A ch 27. Ch 1 then single crochet (sc) across for a total of 27 sc. When you reach the end, ch 1, cut the yarn and pull it through.
Tip: Mosaic crochet leaves a lot of loose ends on the sides of your work. You can either weave them all in, or add tassels or a fringe to cover them.
Row 2: Starting with row 2 and continuing through the rest of the chart, every row will begin and end with a border stitch.
Begin by inserting your hook through both loops of the first stitch. Hook Color B and pull through.
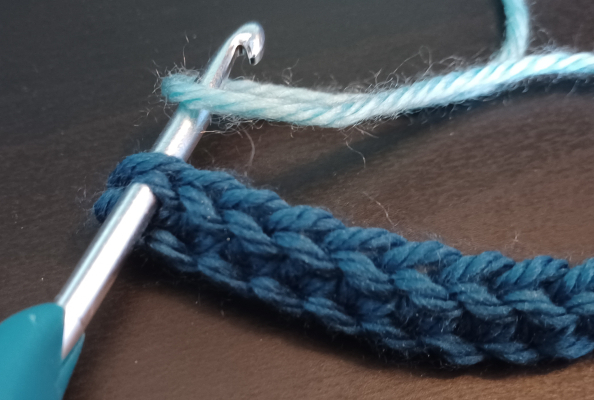
Next, hook the tail end of the yarn and pull it all the way through.
Insert your hook back into the loop of Color B. Hook the working end of the yarn and pull through.
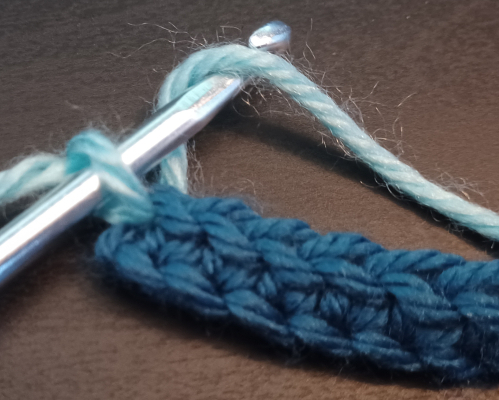
In the same stitch work one sc. This is the first border stitch of the row.
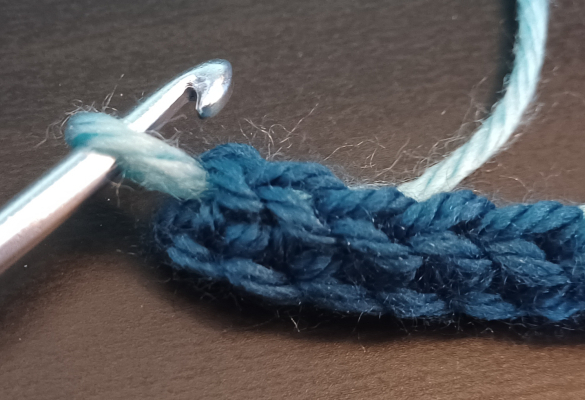
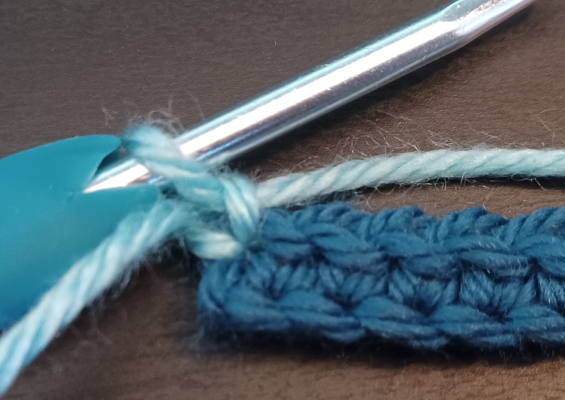
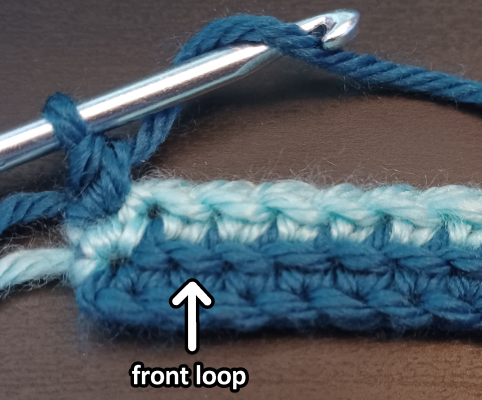
Except for the border stitches, every stitch of row 2 is a sc worked in the back loop only (blo) of the previous row. If you aren’t familiar with working blo, look at the V shape at the top of the stitch: the loop closer to you is the front loop, and the loop further away is the back loop.
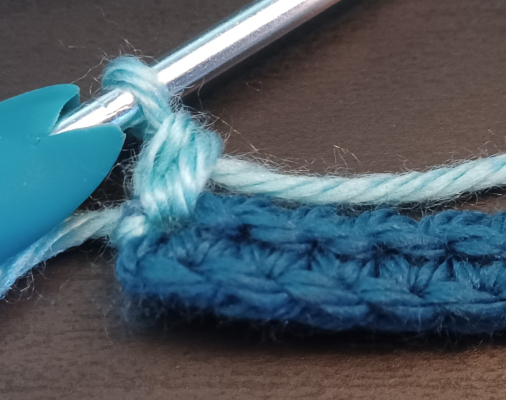
Work blo sc all the way across until you have one stitch left. This will be the second border stitch.
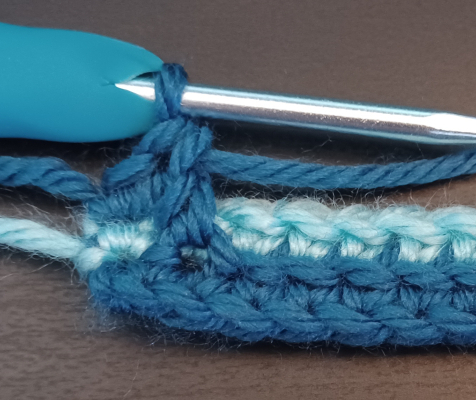
This border stitch is simple: just sc into both loops of the final stitch. Then ch 1, cut the yarn, and pull it through.
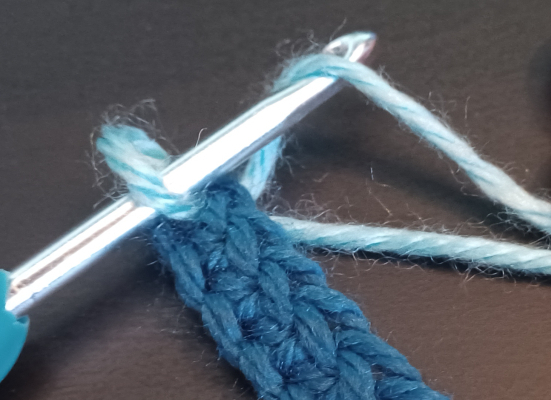
Row 3: Start with a border stitch in Color A in the first stitch, then begin following the chart. This row begins with a double crochet (dc) in the front loop only (flo) of the stitch two rows down.

Continue following the chart, working every stitch in the repeat section twice and ending with the final stitch outside of the repeat section. Finish off with a border stitch.
Note: If you’re working left-handed, you’ll start each row with the non-repeating stitch and then continue with the repeat section for the rest of the row.

Continue working each row, following the chart. When you finish row 13 begin again at row 6, and continue until it’s as large as you want it to be. End your work with either row 9 or 13.
Here are some additional work in progress examples:
Row 4


Row 5


Row 6

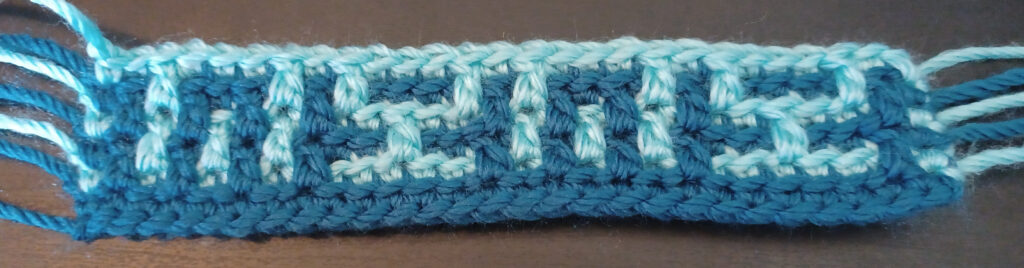
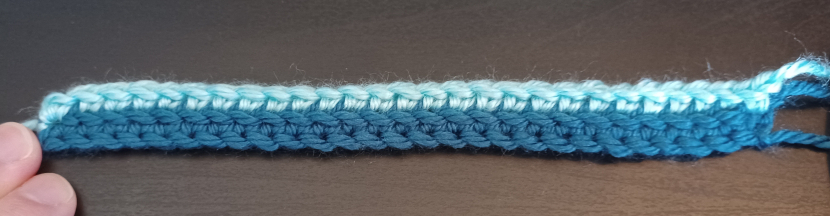
In my example I worked up to row 13 and then completed one additional repeat of rows 6 to 13. The final swatch size is about 6 in wide and 4.5 in tall.

The thing about mosaic crochet is it’s a very flexible style, you can make just about anything with it! I could double the length and height of this swatch, make two of them, and then stitch them back to back to make a throw pillow. Or make it much, much longer and turn it into a scarf or a table runner! If you can make it with double crochet you can make it with mosaic, you just have to make sure the stitch count is right.
Leave a Reply