

When I planned the above wall hanging I really wanted the colors to go all the way to the edges. I didn’t want to add a border color or make the squares separately and sew them together, so instead I had to figure out how to begin row 1 with two colors.
Turns out it’s not actually that hard! Instead of beginning with a foundation chain and then a row of single crochet, you want to begin with a row of foundation single crochet.
Click here to view the right-handed version of this tutorial
If you aren’t familiar with foundation single crochet (fsc), this site has a great tutorial.
Start by determining how many stitches across each color section will be. For my wall hanging I needed to work 28 fsc in each color for a total of 56 fsc across.
With your first color begin working fsc until you have one stitch left. For mine this was 27 fsc.
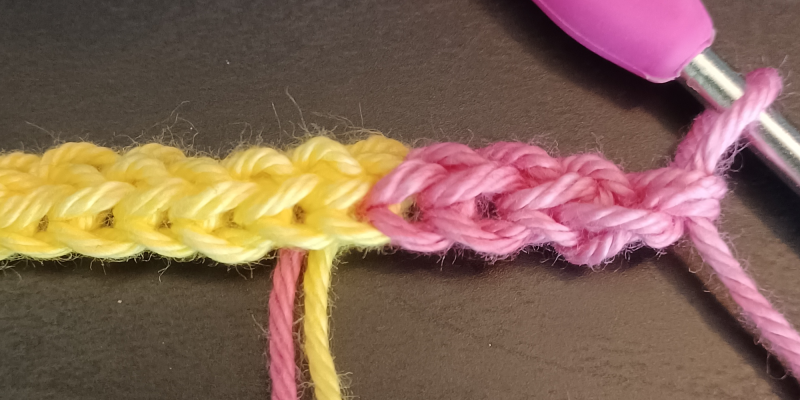
Begin your last stitch, and work it up to the last step. You should have two loops on your hook.

Hook your second color and draw up a loop to finish the stitch.

Work the second set of fsc. When you get to the end of the row, ch 1, cut the yarn, and pull it through. This counts as row 1 of the chart.
Work row 2 as normal in Color B. If you’re planning on using two colors here as well, then once again you want to work until you have one stitch left with your first color, begin the last stitch, and hook the second color to finish that final stitch.
Depending on your project and how many colors will be in use per row, you may end up wanting to carry a color behind the color you’re currently using rather than have to deal with a bunch of ends in the middle of your work. I recommend checking out the section on carrying yarn in my Mosaic Crochet: Three Colors article!
Leave a Reply